Level of difficulty: relatively simple
The Jim score: 8/10
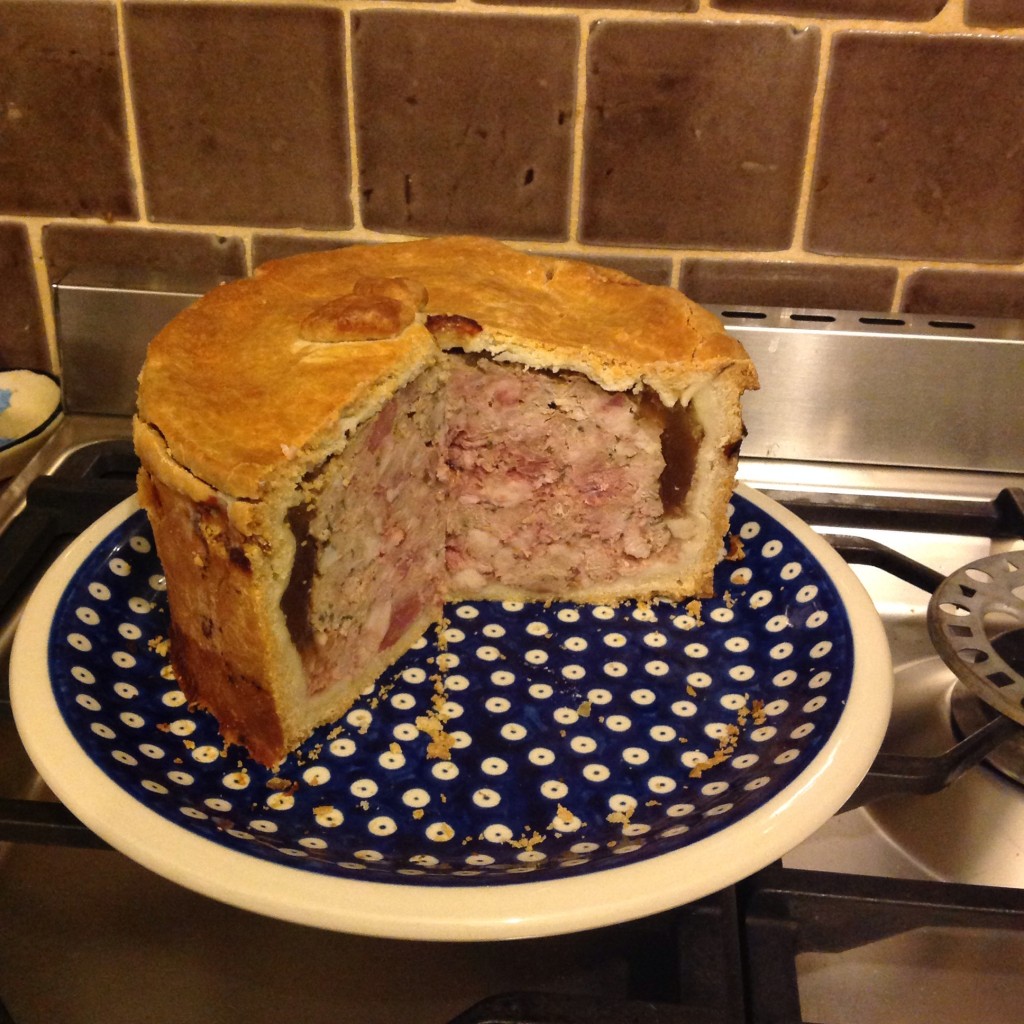
The beast of a Pork Pie
I entered the first challenge with positivity and excitement. The pressure of having a blog post to write after the challenge, time limits set and an expectant Dave awaiting his chance to set another challenge made me hurry up a bit and get on with it. It also has meant there are entries in my calendar like ‘eat roast chicken then make stock’. I also got to go to my favourite local kitchen shop, Kitchen Ideas one lunch break to pick up a deep, 20cm diameter tin for the pie.
The Jim was very pleased my first challenge would be a pork pie – for a long time this has been towards the top of his ‘possible last meals’ list (so long as it would be served with hot English mustard and a pint of Pedigree ale). So after a bit of research I ended up deciding on this BBC Good Food recipe. I amended it very slightly; the ratio of pork shoulder to pork belly and the amount of herbs.
In a very uninspired way, knowing I would be pretty busy at work and rushing around town preceding the Monday night of Pork Pie Production, I ordered all the meat from Ocado. Not what I would normally do – especially since I have now made myself known at my local-to-work butcher, but none the less, a delivery late on Friday was the only way for it to work. For the herbs, to Portobello Road market (which has fantastic stalls for fruit and veg).
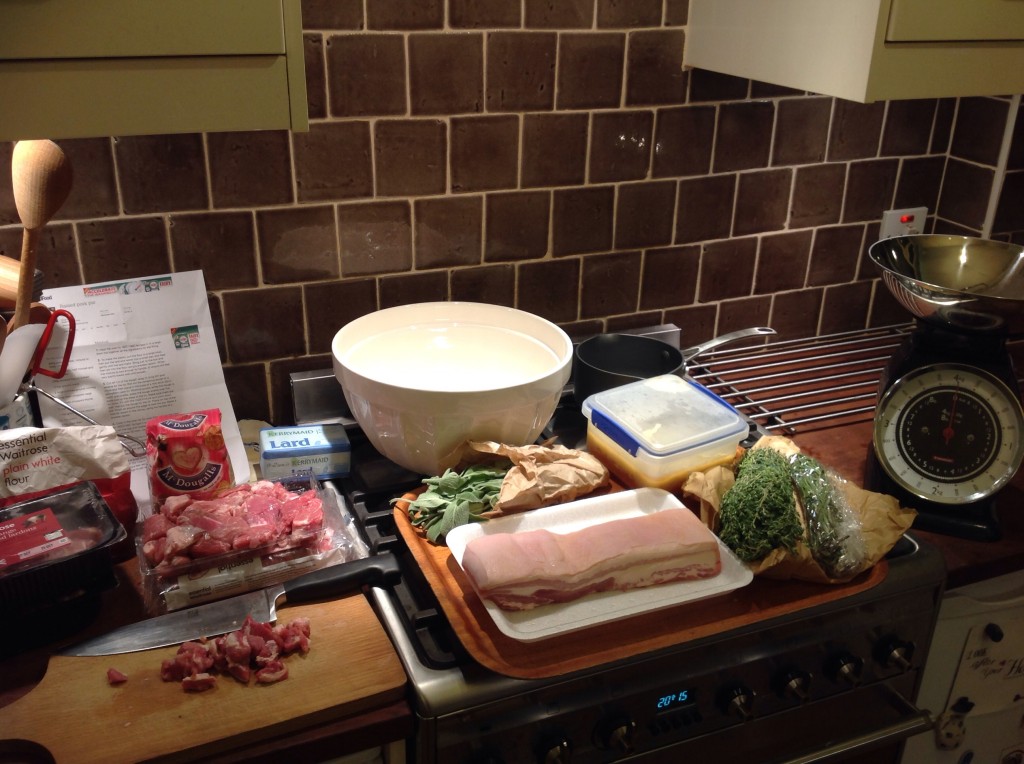
The ingredients
So here we go:
(feeds around 10)
Meaty bit:
300g pork belly (half minced, half chopped)
900g pork shoulder (half minced, half chopped)
250g smoked lardons
2 tbsps fresh, chopped thyme
2 tbsps fresh, chopped sage
1 tsp (generous) ground mace
Salt and pepper
Pastry:
500g plain flour
200g lard
200ml water
For the jelly bit:
300ml home made chicken stock
5 leaves gelatine
Cooking time in the oven: 2 hours 20 minutes.
Heat oven to 180C/160C fan/gas 4
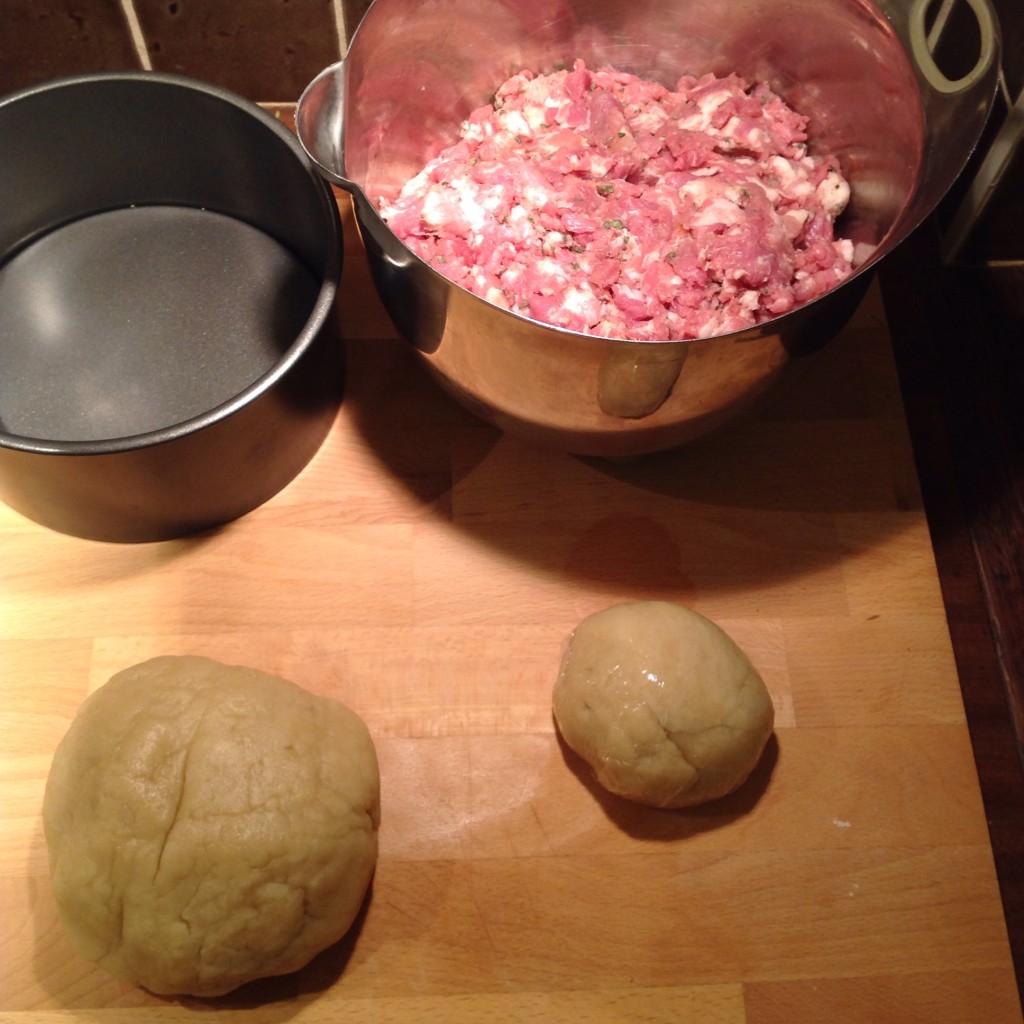
Step one: Meat mix
I bought a whole piece of belly pork and roughly chopped pork shoulder – that was a mistake as it took forever to cut it up small as it needs to be (next time I will go to the butcher) – I wanted texture, but not lumps. Having said that it did allow me to cut off the really excessively fatty bits from the meat which I am not keen on. For the ‘minced’ meat I tested out my food processor. I put in chunks of meat about the size of a thumb and that worked well (just be sure not to do it for too long or you’ll end up with creepy meat paste) and I was pleased with the overall texture of the raw meat mix. I then added the lardons, all the fresh herbs, ground mace and seasoning. I scrunched all the mixture together with my hands until it was well combined and there is the meat part sorted. What is annoying about this bit is that it’s not possible to taste the mixture for seasoning, but I was bold with it in the hope it would be flavoursome.
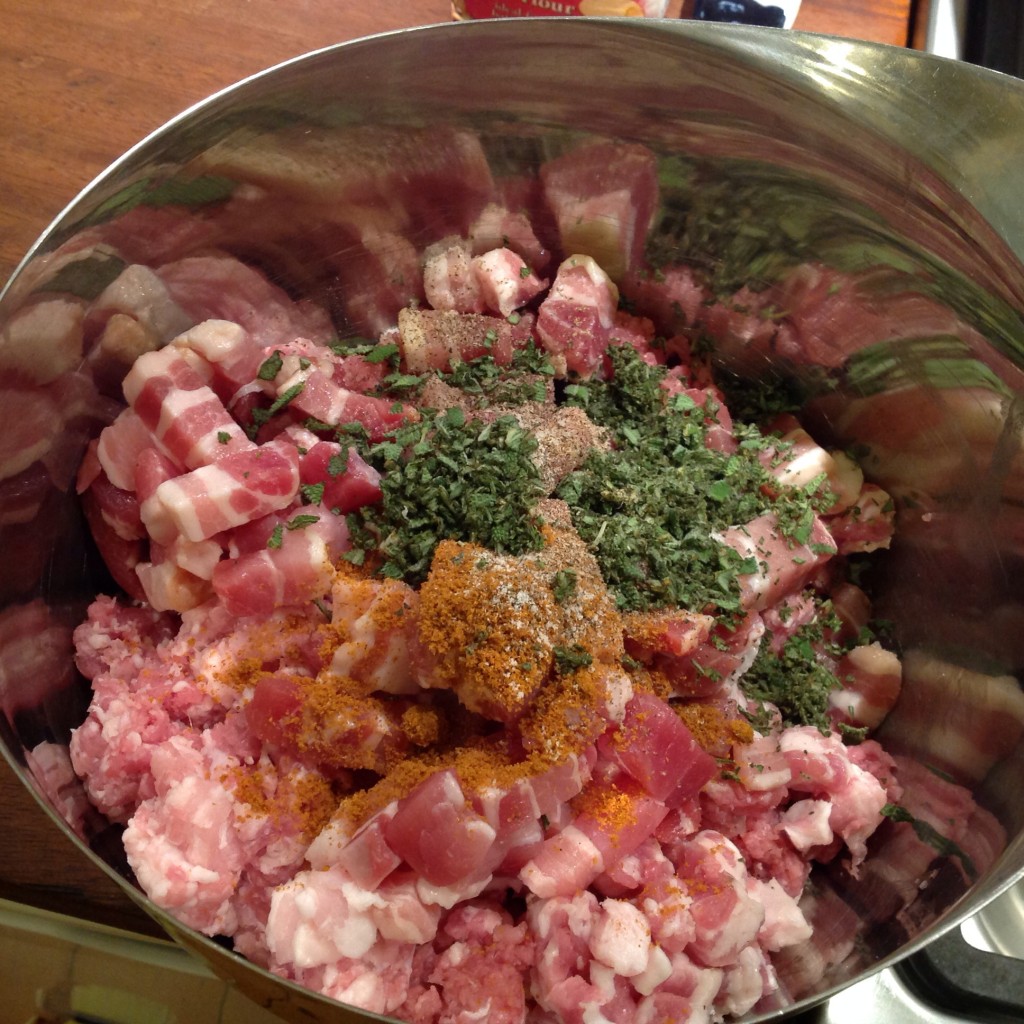
Meat mix
This was very simple – put water into a smallish pan, add in the lard and heat until it’s melted. Once the lard is melted with the water, in a large mixing bowl add it to flour. Then work the dough together so it’s all mixed in and you have your hot water crust ready for action.
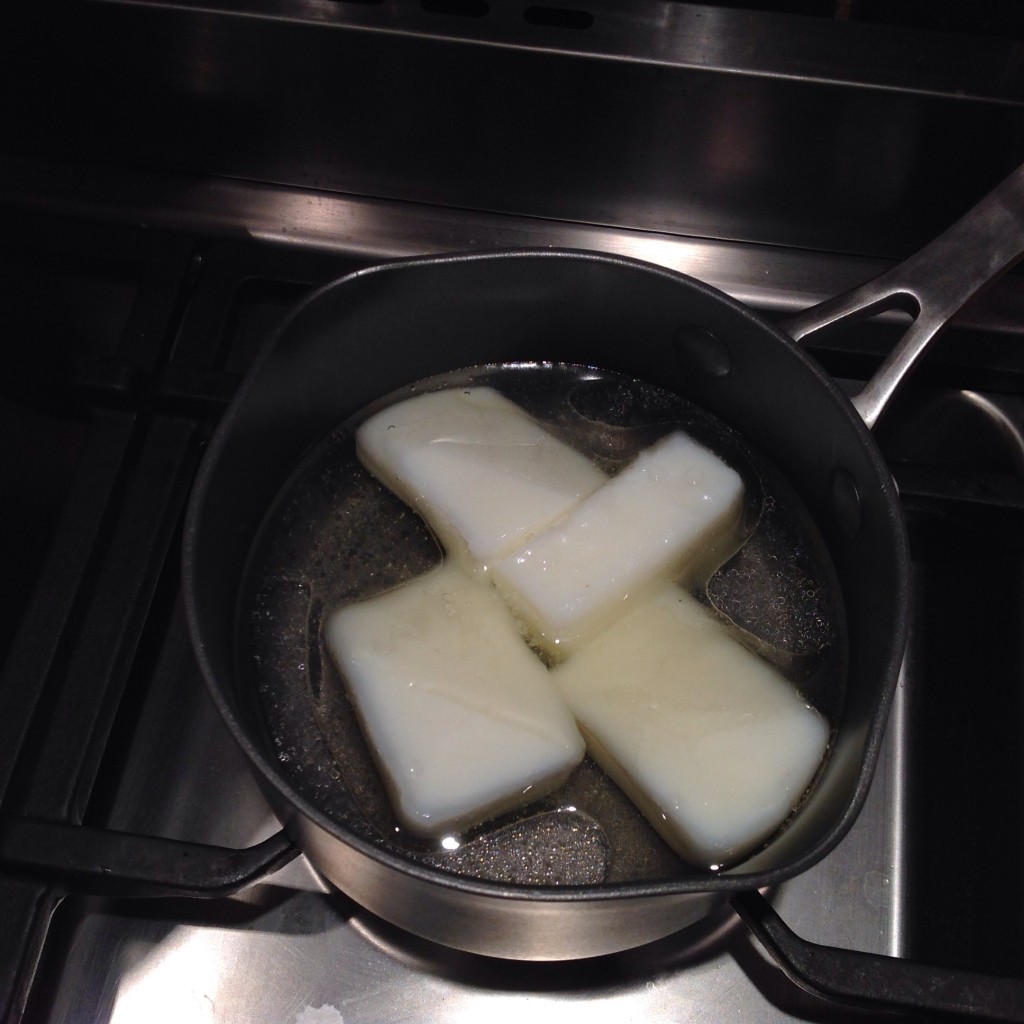
Melt lard into warm/hot water

Combine lard mix and flour
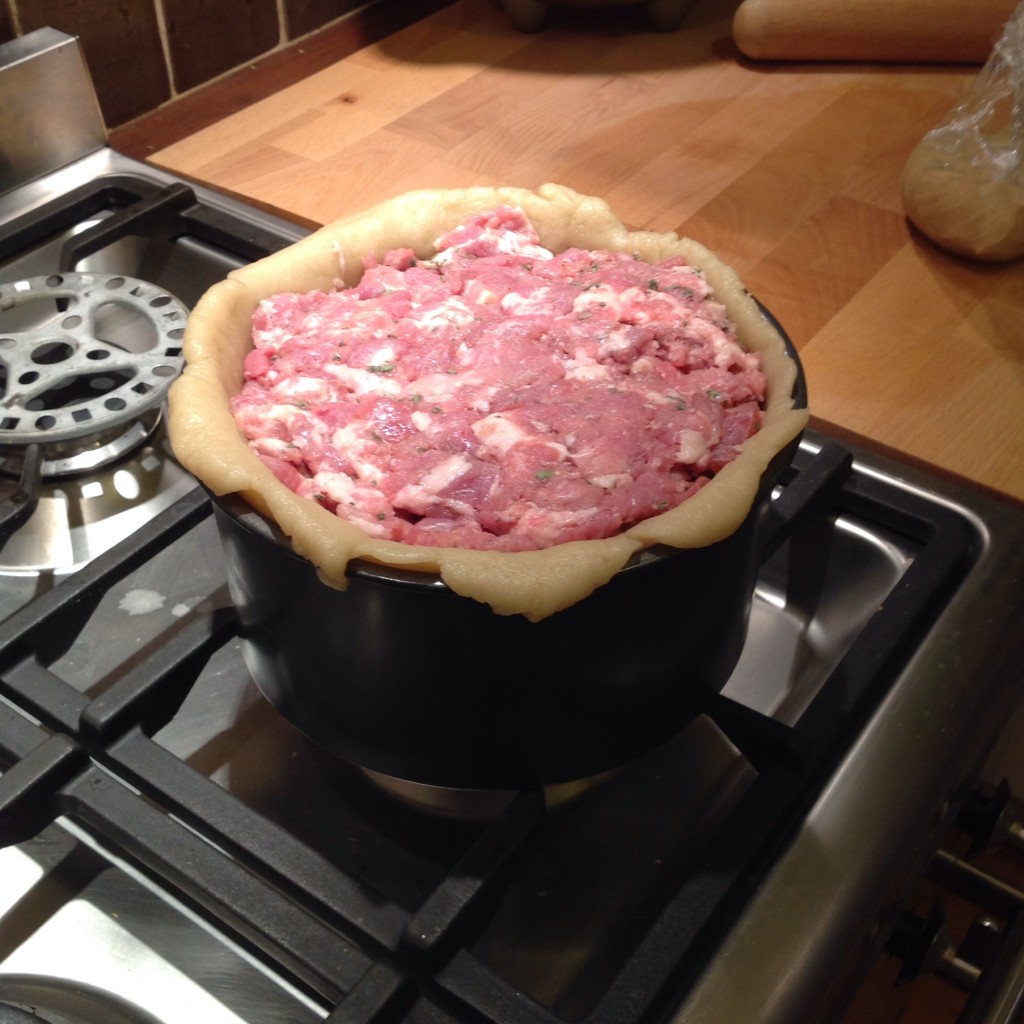
Work quickly with the dough when it is still very warm. Save a quarter for the lid (wrap it in cling film and put to one side), and roll the larger portion out to about three quarters of a centimetre thick, lift it into the tin and push down firmly, but gently to all the corners and make sure it lines all the sides of the tin – you don’t want any thin bits or holes of pastry. I also let it go up slightly over the edge of the tin to give the top something to stick from.
Then take the meat mix and put it in the tin. Push it down (be careful not to nick the pastry with your fingers as you don’t want any holes) and pack it in relatively firmly.
Crust ready for rolling
Ready for the lid
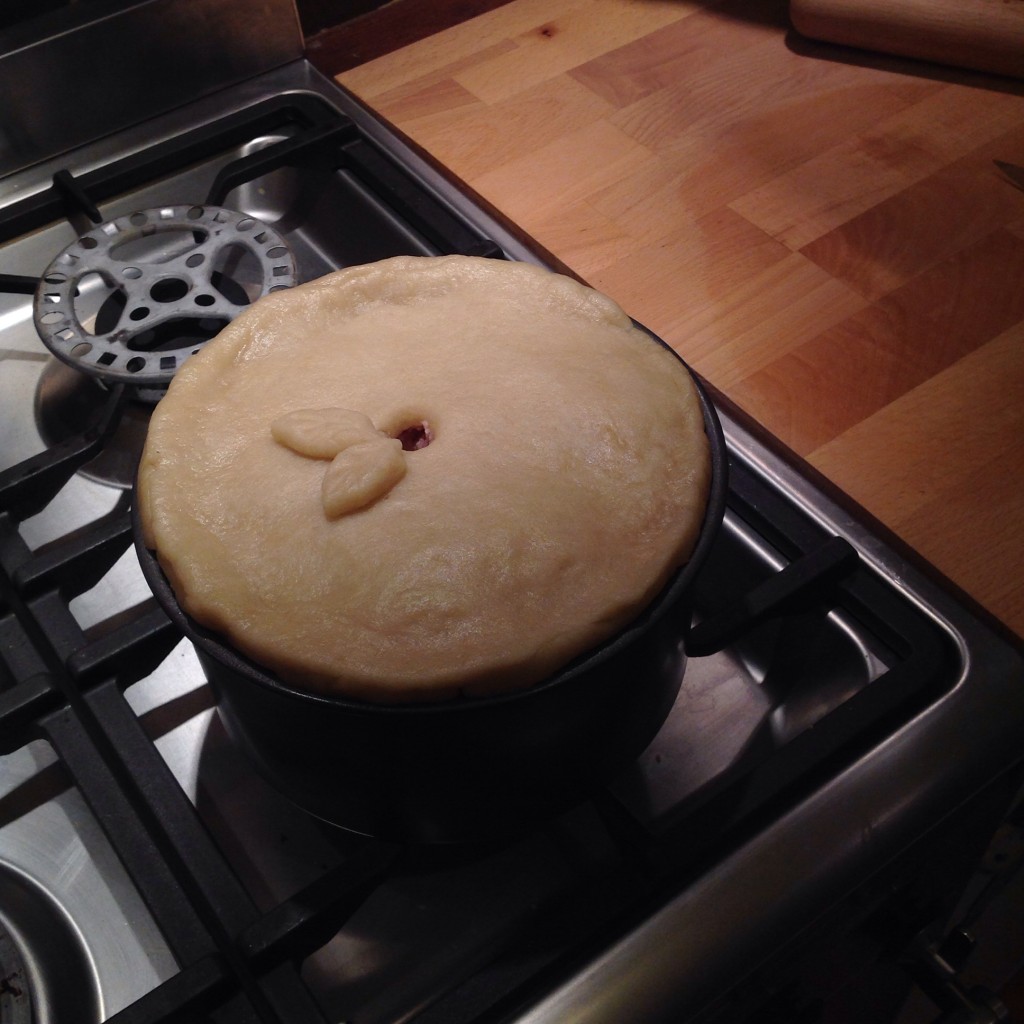
Ready for cooking
Put the beast of a pie in the oven and then cook for a long while.
30 minutes on 180C/160C fan/gas 4
90 minutes on 160C/140C fan/gas 3
Take the pie out in order to brush egg wash on the top (to give it that shiny, good colour) before returning to the oven for a further 20 minutes.
Step five: cooling
Once the cooking has finished, leave it to cool completely. This will take a good few hours (I left mine overnight).
Step six: jelly
I used home made chicken stock for this. Take the stock and warm it up in a small pan. Whilst it’s warming, take five sheets of gelatine and soak them in cold water for about five minutes. Then take out the sheets one by one, shaking off excess water before adding them to the warm stock. They will dissolve easily. Now, here is where that hole at the top of the pie and the lack of holes of the pastry is really important. Using a small funnel, pour in the chicken stock to the pie via the hole. Add a little at a time and wait a little before each addition to give the stock time to get into the nooks and crannies.
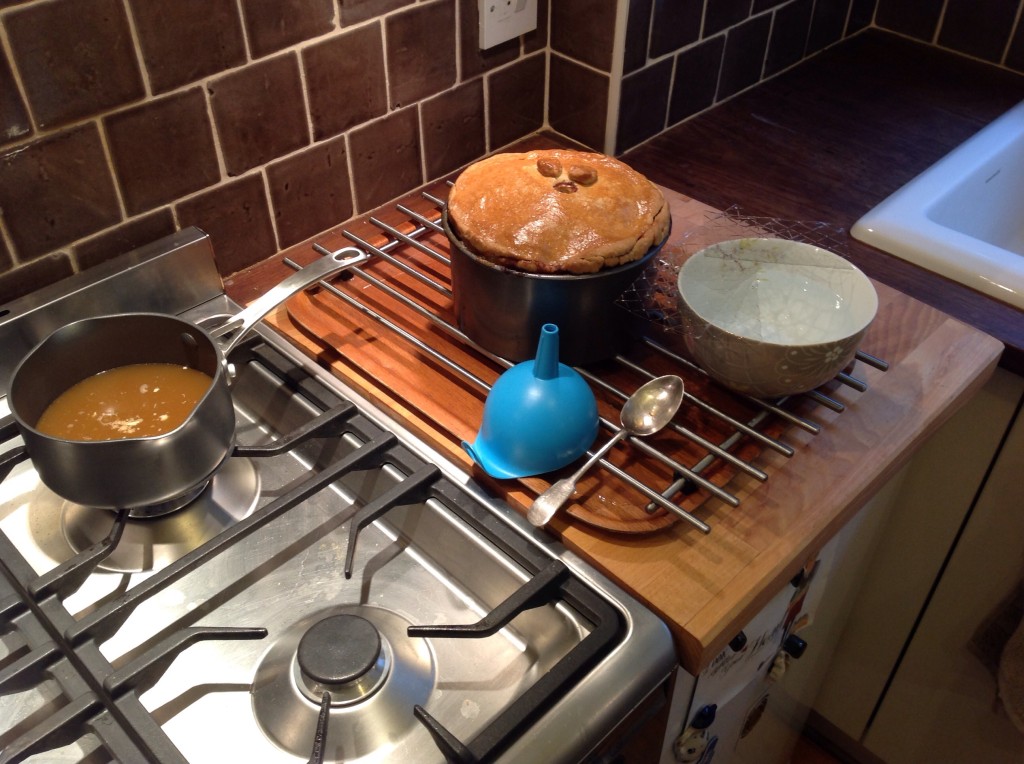
Pie ready for the jelly
Once all the stock is in, put the whole thing in the fridge to set. I left this for 8-9 hours and by the time I finally got home, The Jim had sent me an extraordinary number of photos of the pie he was not yet allowed to eat.
All in all I was pretty pleased with the results of this pie. It has now been tried, tested and ordered by the in-laws for Christmastime. The only complaint from the testers has been that the distribution of jelly could be more even. I would also like to add a bit of extra kick to the pie – perhaps a little mustard powder or some whole grain mustard to the meat, and surely the crust could be a little more interesting?
Well Dave. What are we doing now?
Well done Anya, that looks marvellous! It’s a good job Jim gave it 8/10 – it’s an enormous beast, you’ll be eating that for a week!
It’s interesting that you said you wanted to add a bit of extra kick to the meat. In my attempt, I too felt that the meat needed a bit more something. I’ll continue to experiment with my seasonings and see what I can come up with.
So I made another pork pie. This time I added a generous dash of white pepper to the seasonings – it made a world of difference – that is definitely what was missing in mine. Definitely recommended.
That looks superb Anya! Beautiful. No holes at all. Dave’s first had to be bound with foil to get the jelly in due to a split.
Your kitchen looks so neat and tidy too.
We both felt that the flavour is the missing thing. All that meat and quite a bit of seasoning but it seems bland. Dave’s plan is to buy a Dickinson’s pie and analyse it. He thought the pastry was OK. But like you, I thought the pastry was pretty bland too. But there is no getting away from the fact that they look spectacular. Well done.
Now that is very impressive (both the pie and the blog post). I am definitely too lazy to make a pork pie though!